These seriously impressive but surprisingly easy nail art hacks will have any client convinced you’re the ultimate nail maestro.
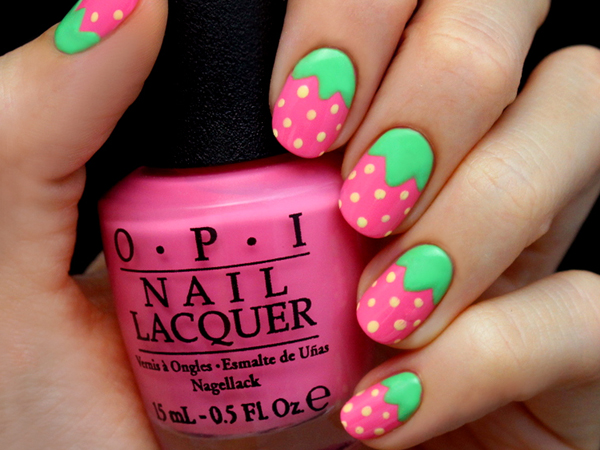
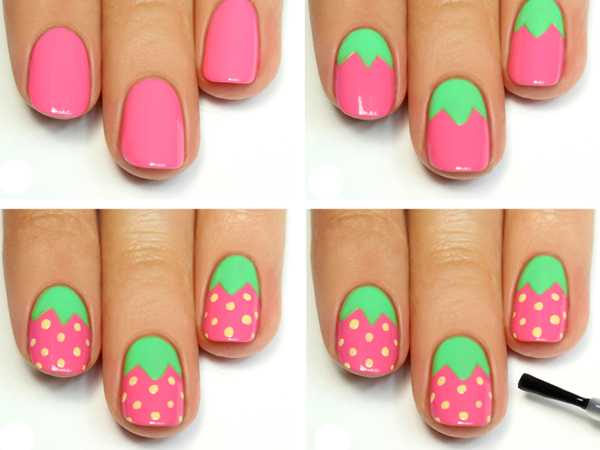
1. Juicy nails
Step 1 Apply a bright pink base coat, allow to dry then add a second coat and leave to set.
Step 2 Using a nail art pen or fine brush dipped in green nail polish, draw in three triangles at the base of each nail to create the appearance of leaves.
Step 3 Dip the rubber stopper end of a bobbi pin in yellow polish and use it to apply dots over the remaining pink polish to create the appearance of seeds, leave to set and seal with a clear top coat.
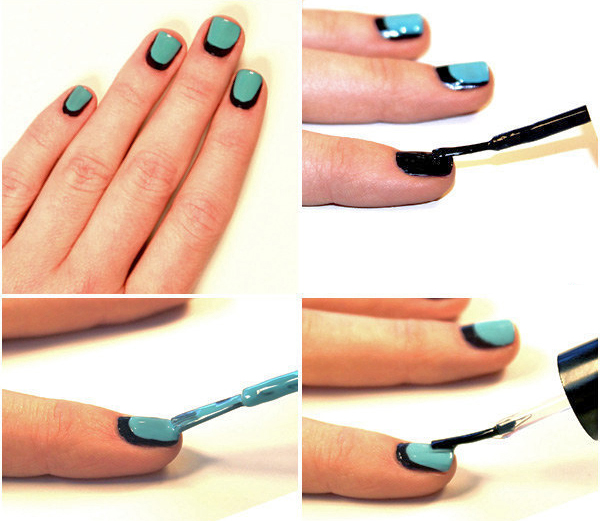
2. Mod nails
Step 1 Paint nails in a black base coat and allow to set.
Step 2 Using a bright pastel polish, paint over the black coat, but avoiding the edges, so a thin line is left around the sides and a slightly thicker line of black is left at the base of each nail.
Step 3 Apply a second coat if needed before allowing to set and sealing with a clear top coat.
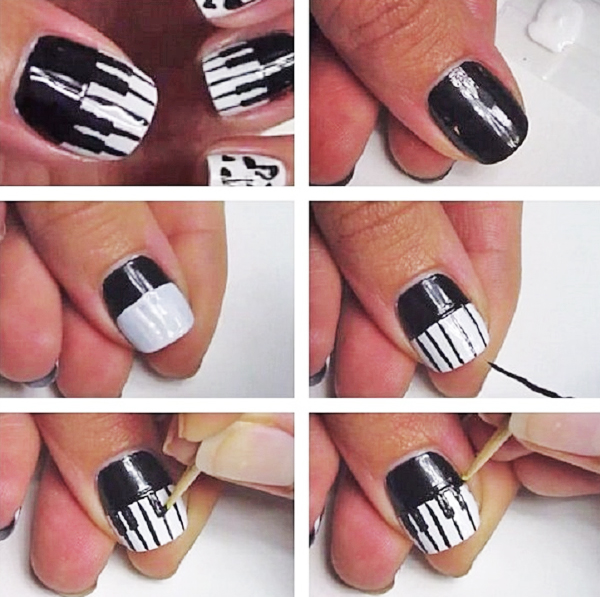
3. Piano nails
Step 1 Paint nails in a black base coat and allow to set.
Step 2 Paint the top half of each nail with white nail polish, allow to set then top with a second coat.
Step 3 Tip a small amount of black nail polish onto a piece of cardboard and using a toothpick, dip into the paint and draw rough vertical lines along the white section on each nail. Go back and draw in thicker, shorter lines to form the black piano keys before allowing to set and sealing with clear polish.
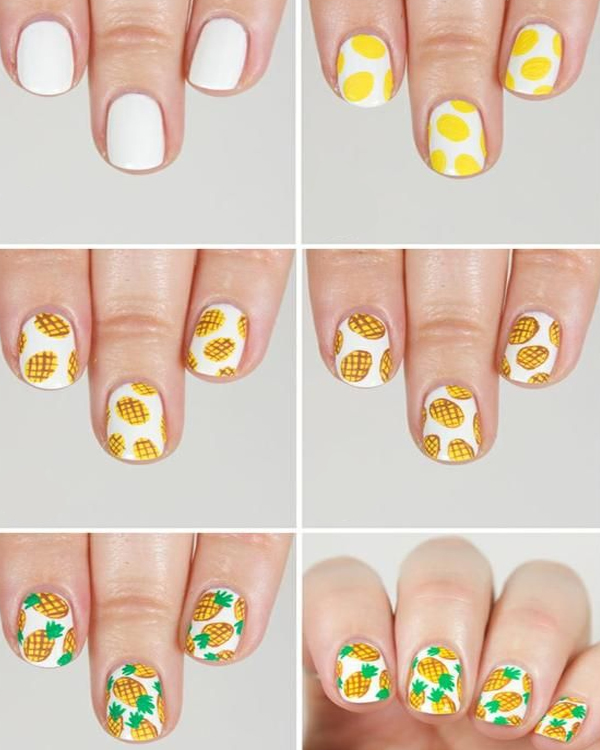
4. Tropical nails
Step 1 Apply a white base coat, allow to dry then add a second coat and leave to set.
Step 2 Using a bright yellow nail polish, randomly draw rough oval shapes all over each nail and leave to set.
Step 3 Using a toothpick dipped in brown or black nail polish, roughly sketch criss-cross lines across each nail to form the texture of each pineapple, then with a fresh toothpick dipped in green nail polish, draw a rough scribble at the top of each pineapple to form the leaves before leaving to set and sealing with clear polish.
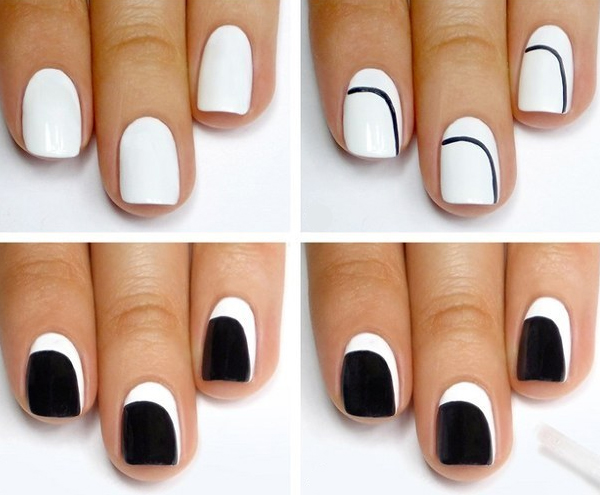
5. Cut-out nails
Step 1 Apply a white base coat, allow to dry then add a second coat and leave to set.
Step 2 Using a black Sharpie, roughly draw a line from the base of each nail, curving around toward the top to form a rounded L-shaped cut-out.
Step 3 Carefully fill in the cut-out area with black nail polish, allow to set and seal with clear polish.
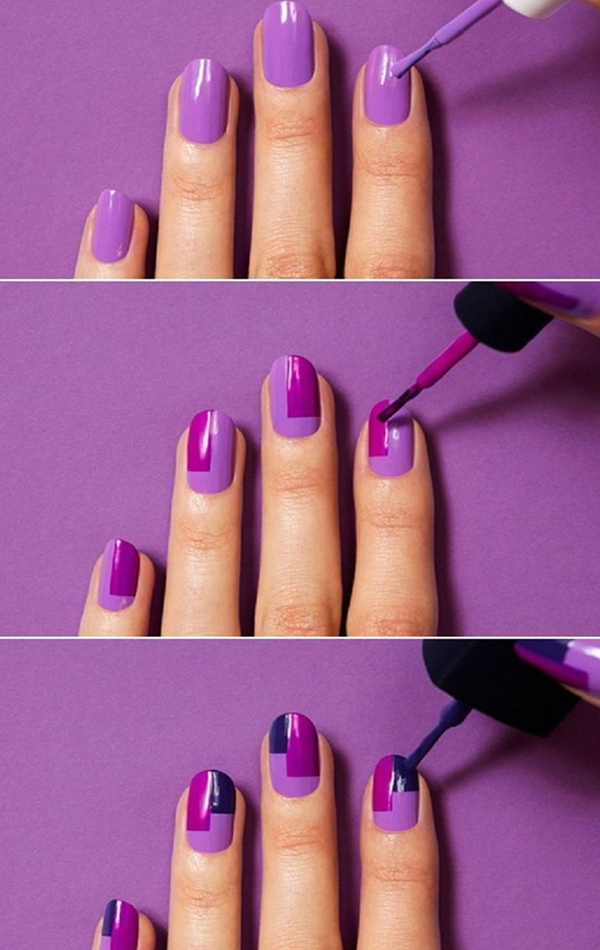
6. Geometric nails
Step 1 Paint nails in a bright pastel base coat and allow to set.
Step 2 Using a darker shade of the same colour, roughly paint a rectangle block from the top of each nail to three quarters the length of each nail.
Step 3 Using a darker shade again, paint a smaller rectangle block beside it – it should be roughly half the length of the first rectangle. Allow to set and seal with a clear top coat.
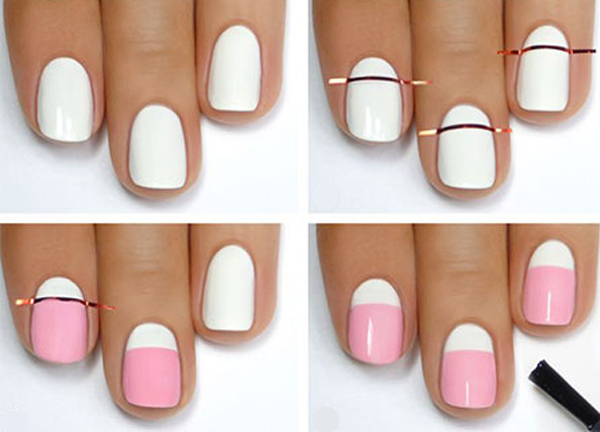
7. Stencil nails
Step 1 Apply a brightly coloured coat, allow to dry then add a second coat and leave to set.
Step 2 Run a small piece of tape horizontally across the bottom half of each nail to mask out that section.
Step 3 Paint the top half of the nail in a contrasting shade of nail polish. Allow polish to set well and then carefully peel back the tape on each nail before coating in clear polish to seal.
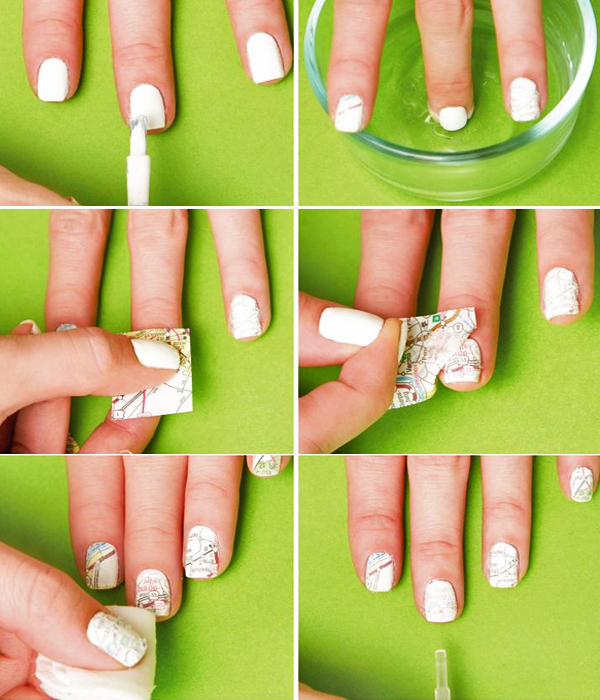
8. Map nails
Step 1 Apply a white base coat, allow to dry then add a second coat and leave to set.
Step 2 Quickly plunge a nail into alcohol then push a small torn piece of map against the nail, holding down for a few seconds to allow print to transfer. Peel back the map to reveal printed pattern underneath then repeat on all other nails.
Step 3 Gently wipe away any excess paper residue with fingers or a fluffy makeup brush before sealing with a clear top coat.
Want more beauty hacks? Check out:
13 Beauty Hacks Every Pro Needs To Know
The Trick To Giving Any Client A Full Pout
7 Nail Art Hacks For Lazy Nail Artists

