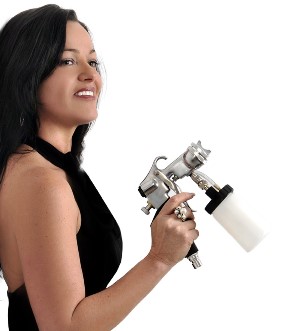
Andrea Taylor from Mediterranean Tan gives a step-by-step guide on how to clean spray tan guns.
 We all know how spray tanning guns build up residue over time. This can leave your mobile tanning business or salon helpless if your equipment fails. A good cleaning routine will help break down those residues to make sure your equipment lasts longer than ever. It is also important to keep your nozzle spotlessly clean as it will help keep the mist application on your clients more even and consistent, resulting in better spray tans. More maintenance and less gun failures mean more money in your pocket.
We have heard all the horror stories of companies that tell you they can’t help you with the problems you are having with a spray tan gun or only help when you buy their solution.
Most problems that occur with spray tan guns are due to a lack of proper maintenance so we are here to help you.
There are 3 Simple Steps:
1 – Daily Spray Gun Clean
- At the end of the day or when the equipment will not be used any more, disconnect the Spray Gun from the air hose.
- Carefully unscrew the cup. If there is remaining solution, either close the cup with a lid, or pour the remaining solution into a proper storage container.
- Rinse the cup under warm running water until clean.
- Turn the gun upside down and allow warm running water to run into the plastic tube, pull back the trigger and allow the water to flow out of the nozzle. Continue until clear.
- Fill the cup about ¼ full with Airbrush Cleaner. Reconnect the Spray Gun to Air Hose. Turn on the Spray Unit. Direct the Spray Gun to a safe area and spray the Airbrush Cleaner through the Spray Gun until the cup is empty and until the Spray becomes clear.
- Turn off the Spray Unit. Disconnect the Spray Gun. Unscrew the cup.
- Start to dismantle your Spray Gun.
- Unscrew and remove the Air Cap Ring. Rinse the threads under warm running water. Wipe the threads and dry. Add a small amount of Spray lube to the threads.
- Remove the Air Cap. Rinse under warm water. Wipe clean, Dip into Airbrush Cleaner and dry.
- Remove the plastic air plate. Rinse under warm water. Wipe clean.
- Re-install the three pieces you just removed by reversing the removal procedure. Your Spray Gun should be ready for the next use.
2 – Weekly Spray Gun Clean
- The Solution needle. To remove: Face the front of the gun away from you, turn the Solution flow screw anti clockwise until it comes out of the Spray Gun. Be careful when removing the solution flow Screw as there is a small spring around the needle. Do not lose it. This is important to the operation of the Spray Gun. Set the spring aside and pull the trigger all the way back until you can grab the needle with your finger tips and pull it out from the back of the Spray Gun. Once removed, rinse under the warm running water, dip into Airbrush Cleaner and dry. Add gun lubrication to the needle. Simply rub a small amount of Spray Gun lube around the needle shaft and spring. Later to re-install repeat these steps in reverse.
- The solution nozzle can be removed for additional cleaning if necessary, the needle must first be removed to do this procedure. With an adjustable wrench or spanner, place the tip of your adjustable wrench or spanner on the two flat areas of the nozzle (whilst the gun is facing you) and twist anti clockwise. Be careful. There is a solution nozzle gasket around the threads of the solution nozzle. Be sure to re-install or leakage will occur. Rinse under warm running water, take a cotton bud dip it into gun cleaner and clean inside the threads. Do not use anything metal as it will scratch the threads or nozzle and this will cause leaking. To re-install repeat these steps in reverse.
3 – Yearly Service
A yearly service is necessary to ensure your spray tanning gun is always ready. Replace seals for around $20-$30 and you are set for another year.
Note: Be aware that any gun that cannot be fully taken apart will block with sticky DHA and bronzers. It’s good practice to check with your supplier first before purchasing.
For more information visit www.mtwb.com.au

